During the winter months we are always searching for ways to keep the kids entertained. Crafts are a great way to let your kid get creative and get them away from the tv/tablet screen. From Egg Carton Penguins to Snow Slime there are tons of crafts out there that your child is sure to enjoy.
Click on the pictures for full photo instructions.
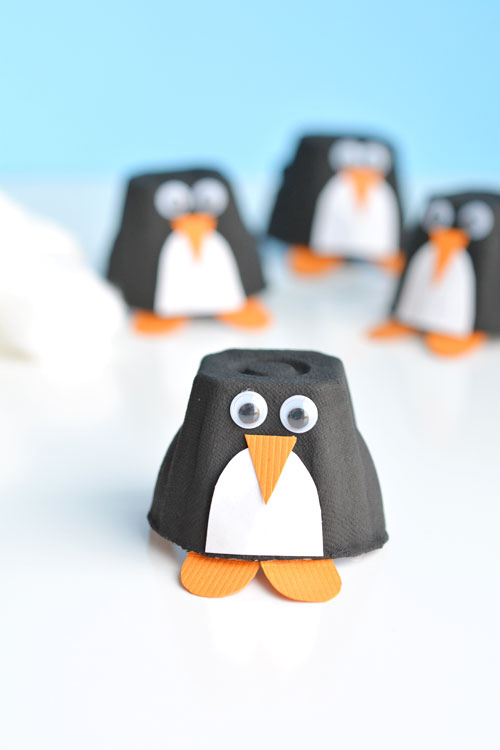
Egg Carton Penguins
Here’s what you’ll need:
Egg Carton
Black Paint
White and Orange Paper
Googly Eyes
Glue
Directions:
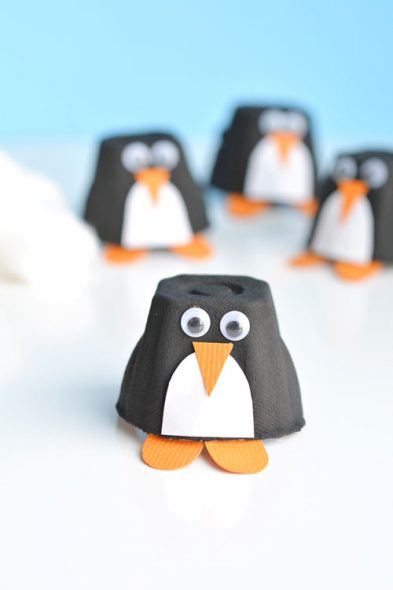
Trim the “cups” out of the egg carton. Then cut out a beak and feet from orange paper and a belly from white paper. Paint the “cups” black. Once you’ve painted the egg carton cups. Glue the white belly onto the little bump that juts out of the egg carton. The shape makes a perfect belly, so if you have white paint, or even white out, go ahead and paint that little bump instead of using paper. Glue on the beak. Glue on the eyes. Fold the feet and then glue them to the inside of the egg carton cup. And you’re done!
Source: OneLittleProject.com
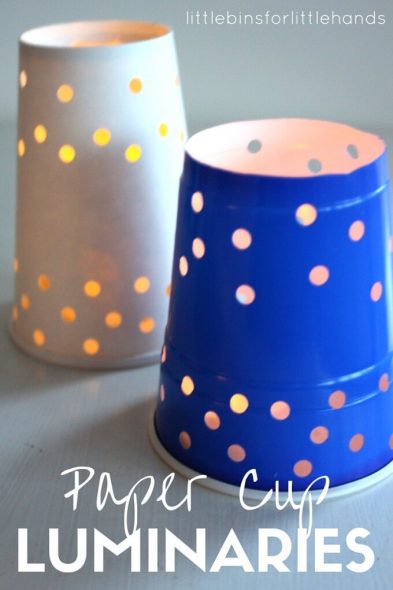
Paper Cups Luminaries
Supplies:
Paper Cups or Plastic Cups {leftover from parties!}
Pretty Scrapbook Paper
Hole Punch
Flameless Tea Lights {battery operated}
Directions:
I call these paper cup luminaries, but as you can see plastic cups will work as well as scrapbook paper. I bet paper towel tubes work nicely too.
We cut out the bottoms of the cups for a better glow. This is definitely an adult required step. Kids can do the hole punching! If you have other shaped paper punches, those will work too. We made holes in paper cups, plastic cups, and sparkly paper rolled into a tube shape and secured. It’s that simple to make these cute paper cup luminaries. Switch on the flames tea lights and place your paper cup luminaries {or plastic cup or paper} on top! That’s it! Celebrate the dark days of the Winter solstice with a simple kid activity that lights up the night!
Source: LittleBinsforLittleHands.com
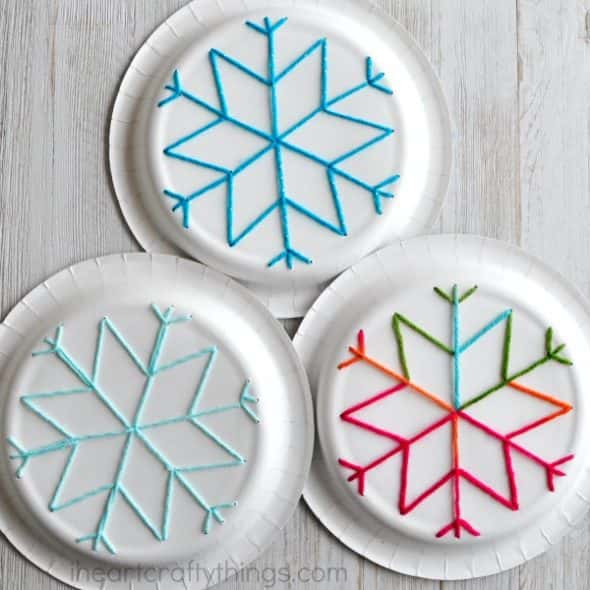
Paper Plate Snowflake Yarn Art
Supplies:
– snowflake paper plates (We purchased ours at Target.)
– push pin
– steel yarn needle (These don’t have as sharp of a tip as normal needles.)
– yarn (color of your choice)
– scissors
– tape
Directions:
1. Start by using your push pin to poke holes in all the end points and intersecting points of the snowflake on your paper plate. See picture below. We have found the best way to do this is to place our paper plate on the carpet and then poke the holes. This way the push pin easily goes through the paper plate and you don’t have to worry about the pin scratching or hurting the surface below. (NOTE: If you can’t find these paper plates simply draw a snowflake pattern on the front of a regular paper plate.)
2. Cut off a big piece of your yarn. Thread one end through your yarn needle and tie a knot at the base of the needle. Then tie a double knot at the end of the yarn.
3. Thread the needle and yarn through the center hole in the plate on the front of the plate, then use the holes you poked and the pattern on your paper plate to thread through the snowflake pattern. You will end up going through some of the holes a few times to get the pattern complete. When you reach the end of your snowflake pattern cut off any excess yarn and tape the end of the yarn onto the paper plate.
Source: iHeartCraftyThings.com
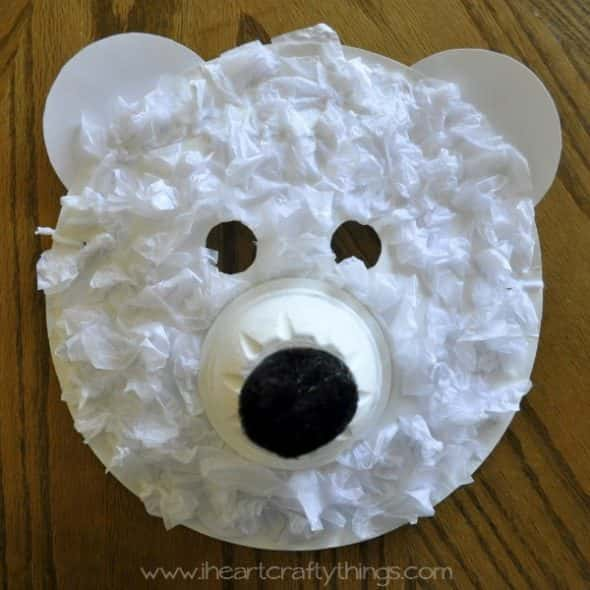
Polar Bear Masks
Supplies you will need:
paper plate
white tissue paper
school glue
white cardstock paper
empty plastic fruit cup
white acrylic paint
black marker
large black pom-pom
glue gun
craft knife
scissors
Directions:
1. The most difficult part about making our polar bear masks was making the holes in the paper plate for the eyes. I traced a small circle for the eyes and then used a craft knife to cut them out. This step must be done by an adult.
2. For the snout we used an empty plastic fruit cup. I also used it to make the ears by tracing it onto a piece of white card stock paper, cutting it out and then cutting the circle in half. This makes the two ears.
3. Paint the clear fruit cups with white acrylic paint and let them dry completely. They may require 2 coats of paint.
4. While the snout was drying, we put school glue onto a section of our paper plate and then placed white crumpled tissue paper squares all over the glue. Do this on every section until the paper plate is covered. We opted to not put tissue paper where the snout was going to go, but I don’t think it matters which way you do it.
5. Next glue the ears to the back of the paper plate.
6. Once the snout is dry, draw a bear mouth on the bottom of the cup with a black permanent marker.
7. Use a glue gun to run glue around the bottom rim of the cup and glue it down onto the polar bear face. Also use the hot glue gun to glue on the black pom nose. (Adult supervision required with use of a hot glue gun.)
8. To finish the mask, simply punch holes onto the sides of the paper plate and tie a knot on each end with a piece of string or yarn. They turned out so cute and my boys gave them a thumbs up!
Source: iHeartCraftyThings.com
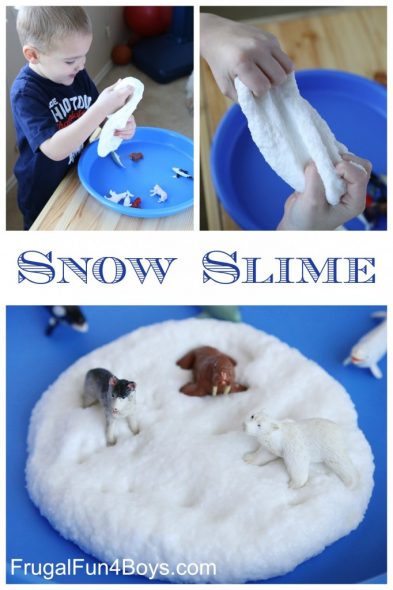
Snow Slime
You will need:
Liquid Starch
Elmer’s white school glue (PVA glue for my UK friends)
Artificial snow for Christmas crafts – This plastic snow is not the same brand that we used, but it looks very similar.
I bought the artificial snow at Hobby Lobby in the Christmas crafts section. It’s very light weight and shimmery. I stirred about 1/4 of the bag of snow into 1/2 cup of white glue. I’m not sure if it’s best to add the snow to the glue, or to add the snow to the completed slime. I ended up adding quite a bit more snow to the finished slime, and it worked out great. So maybe it’s not necessary to stir it in? Oh well, it won’t hurt anything! Then I stirred in 1/2 cup of liquid starch. Stir and then mix with your hands. The mixture should form slime pretty quickly. If your slime sticks to your hands, add a little more starch. If it’s too stringy and won’t hold together, knead in a little more glue. After mixing up the slime, I decided that it needed more snow in it. I ended up using about 3/4 of the bag total. This is a great activity for a winter snow day!
Source: FrugalFun4Boys.com
Until next time!


